

The Little B’s love to draw and colour in and stickers are a must. As we travel a lot and with a big family holiday planned, I decided that I needed an easy way to carry around their books and crayons. At the moment their books are in a pile on the shelf and their crayons are in an ice cream tub (sans lid!) and I tend to carry a mini book and crayons in a sandwich bag.
This carry case is easy to make, perfect for over the summer holidays to take in the car on holidays or picnics and who can resist a bit of Frozen fabric?! If Frozen is not your thing, Plush Addict have a huge range of beautiful options.
After deciding that Frozen was perfect for my #MiniMakers, I picked a complimenting lining fabric and some heavy weight iron on interfacing and earned myself some Plush Points in the process. A member of the Plush Addict team was only too happy to help me find a plain complimenting lining fabric and I received amazing customer service.
So first up, here is your shopping list. This should give you enough fabric with excess so think about how and where you cut your fabrics and what you will make with the left overs ;-)
Plush Addict Shopping List
0.75m Fabric for your outer cover (FROZEN FABRIC FROM PLUSH ADDICT)
0.75m of complimenting lining fabric (KONA CYAN FABRIC FROM PLUSH ADDICT)
0.75m of interfacing (VILENE INTERFACING FROM PLUSH ADDICT)
Here is how to make your art carry case
The ‘prep step’ applies to all of you who have a fabric that is directional such as the Frozen fabric that I am using. I want the fabric on the outer side to be upright, so my first step is to cut two pieces of fabric that are 35cm x 27cm. Sew these two pieces together along the bottom edges with a 1cm seam allowance. Press the seams flat. You should now have a piece of fabric that is 35cm x 52cm. If your fabric doesn't need to be a certain way up, then you can just cut a piece of fabric that is 35 cm x 52cm.

Piece 1 (main case) – 52cm x 35cm (as above for your outer fabric if your fabric is directional)
Piece 2 (inside pocket for book) – 35cm x 22cm (think about the direction of your fabric when cutting)
Piece 3 and 4 (crayons and pencil holders) 46cm x 10cm (think about the direction of your fabric when cutting)
Piece 5 and 6 (handles) 30cm x 4cm
Once they are all cut, iron flat all of your pieces (not the interfacing!)

Fuse the matching pieces of interfacing to the patterned outer fabric.
Place the interfacing glue side up with the fabric over the top face up (back onto the glue side of interfacing). Carefully iron on a hot heat being sure not to hold in place for too long. Allow to set before testing.
The Handles
You should have two pieces of backed pattered fabric and two pieces of lining fabric. For the first handle, place your patterned fabric face up and lay your plain fabric on top. Along the LONG edges, sew with 0.5cm seam allowance. Do not sew along the short edges. Turn inside out and repeat with the second lot of pieces. Iron your handles flat


The book pocket
For the book pocket, you only need to sew along one edge as the rest will be sewn into the case at a later stage. Place the lining fabric for the pocket face to face with the patterned fabric and sew along the 'inside' long edge. Press seams flat, place the right way round and iron pocket flat. NOTE: You should have three open edges.


The crayon pockets


When sewing the crayon pockets, you should only sew along the two long edges with a 1cm seam allowance. Place the lined patterned piece face to face with the lining fabric and sew down both long edges. Turn inside out and iron flat. Repeat with second lot of pieces for second pocket.

Here are your pieces so far

Sew on the crayon pockets


We will sew the crayon pockets onto the lining fabric ONLY. Firstly you need to pin them into place. Find the centre line of your lining fabric and place the first pocket just above it. Pin your second pocket 2cm above that. Now sew the edges to the lining fabrics. This will keep the pieces in place whilst you sewn in the individual pockets.

To sew the individual pockets, I used a fabric pen (or use tailors chalk) and some masking tape. Firstly along the top and bottom edges of the pockets, mark every 4cm. The first mark from both ends should be 5cm in to allow for the 1cm seam allowance. Now on the lining fabric, right along the edge of the pockets if you lay them flat, mark every 3cm. Again, the first mark from each end should be at 4cm to allow for seam allowance.
Next, take a piece of masking tape and line it up on the front of one pocket making sure it lines up with your first two marks (still with me?). Now lining it up with the first set of marks on your lining fabric at the same time, stick it down. Sew really close along the edge of the masking tape from the top to the bottom of the pocket. When you remove it, you should have an individual crayon pocket and you can line up the next one!


When you have sewn all of the individual pockets, sew along the bottom of each row to close them up. An easy way to do this is to straighten the bottom of the pockets, putting the creases where you want them and hold them in place as you push them through the machine. I used a crochet hook for this.


Now to put the whole thing together!


Lay the main body with the pockets out flat and straight. Lay the colouring book pocket on top face up. This should be laid out how you expect the inside to look. Pin your handles to the outer main body piece. Careful about which way round you pin them, use the picture as a guide. They should be edge to edge with the main body. Pin handles 10cm from each side. Now sandwich these pieces together face to face and pin or clip them. Sew around the 'sandwich' with a 1cm seam allowance leaving a space for turning it out. Snip the corners carefully being sure not to nick your stitching. Turn the case the right way out and push out the corners carefully with your wooden spoon handle or something similar. Fold the seams in on the open edge, iron flat, pin together and sew closed as close to the edge as possible.


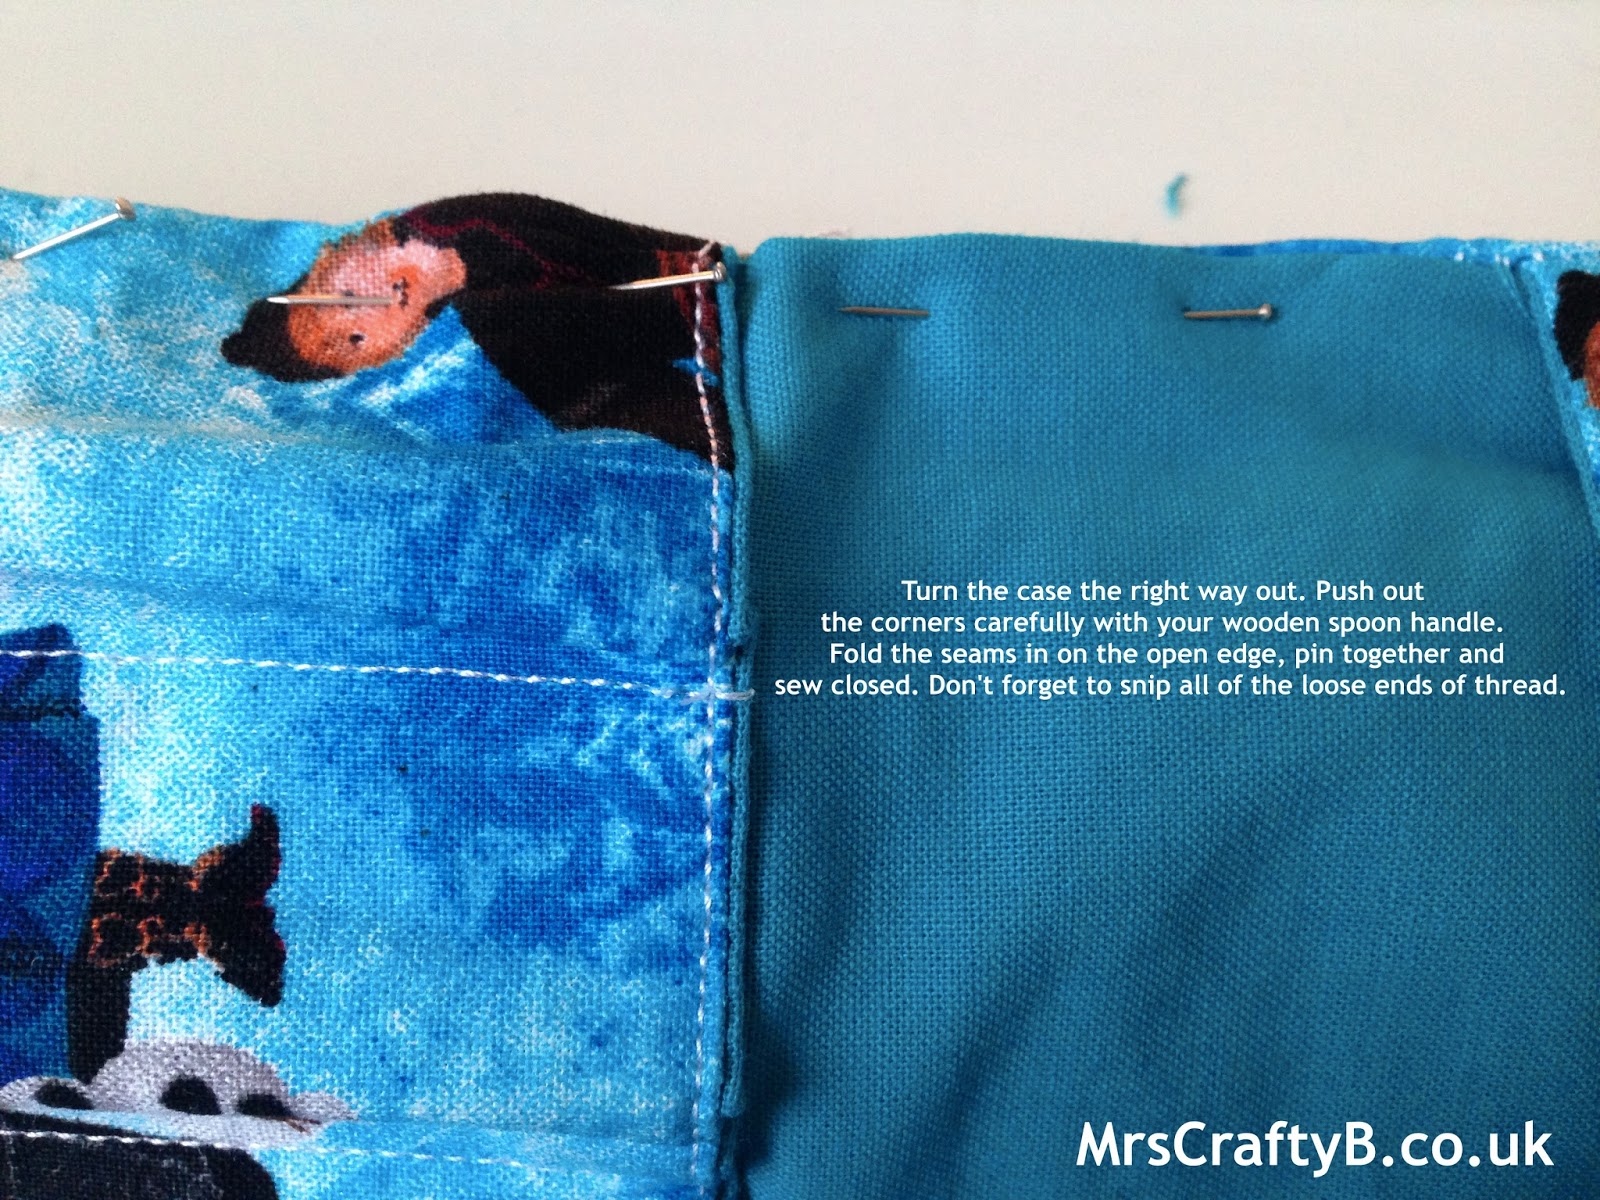
Don't forget to snip all of the loose ends of thread to tidy it up. Iron the who case flat, fold in half and press the crease.
VOILA!
(more pictures to come!)


Here are a couple of tips:
* When sewing your lines with the machine, don't forget to reverse the machine for a few stitches at the beginning and end of each line to make it secure and unlikely to undo!
* I purchased some iron on velcro to place on the edges by the handles to fasten the case closed. I decided not to use it but you could include a fastening such as this or a button or even a zip!
Enjoy making your colouring case and having a little peruse over at Plush Addict! I would love to see pictures of your finished cases with your #MiniMakers (or you!) enjoying them.

Follow Mrs Crafty B


It look so cute and fab! How I wish I knew how to sew and make this stuff coz my little girl is into frozen and she would definitely love this. Great way to keep those coloring pens well-organized too! #MakingHome
ReplyDeleteHave you ever given sewing a go? This was one of my very first 'big' projects!! #MakingHome
DeleteThats perfect for keeping those crayons safe and sound - they do have a habit of turning up in unexpected places.
ReplyDeleteAngela - Garden Tea Cakes and Me
Tell me about it! They get everywhere. Most of ours are in an old ice-cream tub but this is perfect for taking away with us in the car etc.
DeleteRound TableCloth
ReplyDelete2020 Laces Embroidered
Beaded Mesh Lace
Mesh Lace
Floral Mesh Lace
MINKY FABRIC
Hello There. I found your blog using msn. This is an extremely well written article. I will be sure to bookmark it and return to read more of your useful information. Thanks for the post. I’ll certainly comeback.travel booking advisor online
ReplyDeletey0h41r4n26 h8t95e9c25 c0i95w1h63 n9u36v7p92 k0j46j0p77 r2d08i2p14
ReplyDelete